Search This Blog

Monday, September 29, 2008

Trik adsense

Solusi Larangan Trik Gambar Di Samping AdSense


Salah satu trik dasar yg banyak digunakan oleh publisher AdSense dan telah terbukti berhasil mendongkrak pendapatan mereka adalah pemasangan gambar di samping ad units AdSense. Sayangnya, berdasarkan aturan (policy) terbaru yg dikeluarkan Google Januari lalu, publisher tidak diperbolehkan lagi meletakkan gambar di samping AdSense. Ini mencakup segala bentuk gambar dan segala bentuk kreasi layout ad units, lebih ketat dibandingkan aturan sebelumnya mengenai gambar di samping iklan pada sekitar bulan November 2006.


Meskipun saat ini efek metode gambar sudah tidak sedashyat tahun lalu, saat ia pertama kali digunakan, tapi jelas pelarangan ini sedikit merugikan kita sebagai publisher. Saya sendiri lebih memanfaatkan gambar di samping iklan sebagai saranan mempercantik tampilan, sehingga agak bete juga saat mengetahui perubahan policy tersebut.


Salah satu solusi alternatif adalah dengan meletakkan iklan AdSense bertipe image di samping iklan AdSense bertipe text. Misalnya, pasang ad units banner gambar berukuran 468×60 di atas ad units bertipe text dengan ukuran yg sama.


Image Unit 468x60 Images

Text Unit 468x60 Images


Atau ad units image ukuran 200×200 di sebelah kiri ad units text berukuran sama.


Image Unit 200x200 ImagesText Unit 200x200 Images


Yg di atas hanyalah contoh yg gambarnya diambil dari Google Help Center. Untuk hasil yg lebih optimal, publisher dapat memberikan warna yg sama dengan warna background (latar belakang) pada garis pembatas (border), sehingga menghilangkan kesan kaku.

Cara ini saya gunakan di situs DiaryMark, yg ngomong2, buat yg butuh tambahan backlink, bisa submit situsnya ke situs ini :) PageRank 3 loh, hehehe.


Semoga bermanfaat.

:D :)

Saturday, September 27, 2008

Bisnis Online - Indosat 3G Broadband - Sang Model Iklan (Hot Banget!)

  • Indosat 3G Broadband - Sang Model Iklan (Hot Banget!)
  • Barangkali ada yang belum lihat iklan terbarunya Indosat 3G Broadband Unlimited Package? Emang belum keluar sih iklannya, nah ini saya kasih bocorannya yah. Seperti biasa, klik gambarnya untuk memperbesar

    (Hot banget, sexy.. maknyuss..)


    **akhirnya datang juga indosat 3g broadband unlimited huehue…

    Tuesday, September 23, 2008

    Informasi HP baru dari Studio Handphone

    (//)

    Untuk mengetahui informasi handphone-handphone terbaru, anda dapat mengunjungi :
    http://www.studiohandphone.com

    Barang ini bisa anda dapatkan di :
    Studio Handphone
    ITC Roxy Mas Lt. 1 No.95, Telp : (021) 63855718


    Untuk mengecek harga-harga handphone terbaru hari ini, anda dapat mengunjungi :
    http://www.studiohp.com

    Monday, September 22, 2008

    Update your display driver

    Normally when we buy a new graphic card, it's including cd driver which we use it to install the hardware after attach it on mboard. But do you know, we need to update the driver from website graphic card provider depend on what brand you use, ATi @ NVDIA.

    If you are a hardcore gamer, you really need to update your graphic card to make sure a new game can play on your system. Example my graphic card is ATI Radeon 9550 AGP 8X. I need to update my graphic card from internet to make sure my system can run a new game. You can check the change log or release note from the website. Sometimes we need to update graphic card driver because of several problems such as display conflict with system, driver stuck, screen blank couples of time suddenly and need to restart.

    Example, when we using pc and suddenly it's blank on your screen. We restart pc and check on log file in control panel.


    Goto Control Panel > Adminstrative tools > Event Viewer


    Scroll down and look where have error base on date and time


    My system failure because of display driver


    If your pc have no problem, you can choose want to update or not. Even you buy a new one, you still need update from internet. My other pc's using PCI-E card GeForce 8500 Super GT and I updated the driver just because to make sure I have best result when play a pc game. The result after was better than before.

    Wednesday, September 17, 2008

    Virus: Antivirus 2009

    Name: Antivirus 2008 or Antivirus 2009

    Category: Fake Alert


    Icon tray will place in taskbar as picture above


    Some Antivirus did not detect anythings, so I try scan using AVG 8.0 FREE and detected 4 viruses on system.


    You will see this error message (fake error) if your pc effected by this virus. For the first time I been hit by this virus, it's make me scared but after for a while I realize it's fake. Can you see above picture? read carefully. How to know it's fake or not? Press windows button on keyboard and you will see what happen.


    This message will appear after that. Look carefully


    In windows this message will pop up

    How to remove:
    1. install AVG free
    2. update
    3. scan your system in safemode

    Actually you can delete this virus manually. If you try to remove this virus from 'add / remove program' it's doesn't work.

    Tuesday, September 16, 2008

    HOW TO: Setup Database

    Ok, this is the way how to set up database in server. If in your server have database already and you try to create a new one, please back up your database or do 'full backup' for security reason.


    Login as admin on your website. Normally if your url http://www.contoh.net just put /cpanel behind the url. Example: http://www.contoh.net/cpanel


    Put your username & password to login as admin or owner of hosting. When we buy a hosting, provider will give you a username & password. If forgot, please refer your server provider for help.


    You are now in admin mode (cpanel). Click on "MySQL Database" icon.


    1. Create new database: Put database name after that click on "create database" button.
    2. Create user: Put your username & password, click on "create user" button.
    3. Add user to database: Select user you created new before & new database you just created. Click on "add user to database" button.


    picture 1


    Picture 2

    After finish, your new database & username will show as picture above.


    Goto PhpMyAdmin and you will see your new database ready to use.

    request by trojan

    Sunday, September 14, 2008

    Google AdSense - (Bukan) Cara Mudah Mendapatkan Uang di Internet

    The following search terms have been highlighted: Cara mudah google adsense

    Google AdSense adalah cara mudah untuk meraup dollar di internet


    Benarkah?


    Jika Anda termasuk orang” yg masuk ke bisnis AdSense karena mengganggap AdSense adalah cara mudah untuk mendapatkan uang di internet, maka dengan berat hati saya harus mengatakan kalo “Anda salah!“.


    Mitos ini tak lebih dari sekedar propaganda yg dilancarkan oleh orang” yg berusaha untuk meraih keuntungan dari para pemula ato orang awam. Dengan menjual e-book misalnya. Ato memberikan pelatihan tidak gratis dng biaya iuran bulanan yg tidak murah. Ato juga menjual software” ato template” yg membuat Anda seolah” bisa ongkang” kaki di depan komputer dan melihat uang masuk dng sendiri.


    Kenyataannya?


    Sedikit sekali publisher” baru (istilah bagi webmaster yg memasang iklan AdSense di situsnya) yg bisa terus survive dan menghasilkan pendapatan yg signifikan dan sebanding (bahkan lebih) dng usaha yg dilakukannya. Sama seperti hasil survey mengenai wirausaha yg beberapa waktu lalu saya baca. Dari sekian banyak usahawan baru, hanya 20% saja yg bisa bertahan melewati tahun pertama. Persentase ini akan semakin menyusut di setiap tahunnya, dan bukan tidak mungkin di tahun ke-lima nanti hanya tersisa 1-2 usahawan sukses dari angkatan tersebut.


    Begitu pula bisnis AdSense.


    Saya mengikuti hampir semua forum lokal yg membahas ttg AdSense, dan dari banyak kasus yg ada, kesalahan (baca: kegagalan) berpangkal pada anggapan di atas yg tanpa disadari telah menjadi semacam pedoman “kerja” bagi para publisher pemula.


    Content yg didapat dari hasil copy-paste, topik yg terbius oleh iming” high paying keyword, situs/blog yg dibuat secara otomatis dng software, dan sebagainya. Seolah” hanya dng bermodal dengkul seperti itu, dollar akan datang dengan sendirinya.


    Yg lebih parah, karena sudah terlanjur termakan oleh mitos, maka publisher” muda ini akan berusaha menggunakan cara apa pun untuk sekedar menggemukkan pundi” dollar di statistik AdSense mereka. Click fraud, force click, dan automated click, hanyalah sebagian kecil dari usaha tidak-halal yg dilakukan.


    Hasilnya, meskipun di awal” tampak aman, surat banned pun melayang juga pada akhirnya.


    Yah teman, bisnis AdSense pada kenyataannya tidak semudah yg digembor”kan.


    Memang, saya tidak akan mengingkari adanya publisher” yg cukup berhasil hanya dng berpangku-tangan saja. Tapi sekali lagi yg perlu diinget, persentase-nya amatlah kecil, jika dibandingkan dng yg gagal.


    Bagaimana solusinya?


    Yang paling utama tentunya adalah menghilangkan anggapan bahwa bisnis AdSense adalah bisnis yg mudah dan tidak perlu usaha keras. Ingat, semua jenis bisnis pasti beresiko dan butuh usaha. Apa pun itu.


    Selanjutnya, langkah” berikut mungkin dapat dijadikan pedoman awal dalam meraih sukses dng AdSense.


    1. Selalu mulai dng membuat situs web dng topik yg Anda kuasai ato Anda suka. Lupakan high paying keyword. Jadikan situs ini sebagai situs utama Anda, ato menurut istilah saya adalah situs inti / poros.

    2. Stl situs selesai, lanjutkan dng melakukan optimasi dari sisi SEO (Search Engine Optimization).

    3. Langkah berikutnya adalah promosi situs. Promosi dpt berupa melakukan submit ke situs” search engine, pemasangan iklan baik online maupun offline, direktori, top list, dan sebagainya. And for God’s sake, hindari SPAM!

    4. Selanjutnya, Anda tinggal menunggu hasilnya sambil terus secara berkala melakukan update (kecuali untuk situs” jenis tertentu yg tidak membutuhkan update dari webmaster).

    5. Berdoa. Kita sudah berusaha, maka jangan lupa untuk berdoa semoga usaha yg kita lakukan tidak sia”.

    6. Jika saatnya sudah tepat, lakukan ekspansi bisnis dng membuat situs baru dan lihat kembali pada langkah 1 di atas.


    Bagaimana detilnya? Tunggu artikel selanjutnya :)


    Tulisan ini adalah bagian pertama dari entah berapa bagian yg sama sekali belum direncanakan.


    Thursday, September 11, 2008

    Cara mudah membuat Account di Google Adsense

    Langsung aja dech..!! Disini saya akan berbagi sedikit pengalaman saya
    dengan membuat account di Google Adsense yang mudah diapprove oleh
    Adsense..
    1. Buat blog di blogger.com dan setting seluruhnya menggunakan bahasa inggris.
    2. Buat minimal 1 postingan keblog baru anda dengan menggunakan bahasa
    inggris, (kalau anda merasa kesulitan posting dengan bahasa inggris,
    anda bisa copy paste aja yang ada) untuk setting bahasa inggris pada blog anda, klik setting > format> ubah seluruhnya format blog anda dengan bahasa inggris
    3. Klik add gadget pada kostumisasi setingan layout anda, nah disitu
    klik Adsense
    4. Klik creat new account, dan ikuti langkah selanjutnya.. Dan cek email anda
    5. Klik link yg telah dikirim oleh google adsense untuk verifikasi,
    setelah verifikasi berhasil silahkan tunggu.. ( pengalaman, waktu saya
    daftar kurang lebih sekitar 6 jam sy sudah menerima balasan bahwa
    account yg saya ajukan di approve..) kalau diapprove pasti diawali
    kata congratulation ko... Jd kalow yg blum mengerti bhasa inggris,
    tandain aja,, yg penting kalow ada kata itu berarti diteriam...
    He...He..
    6. Selesai
    7.Eh.. Nanti dulu masih ada lg... setelah kamu diapprove/disetujui
    adsense, jangan lupa tugas kamu tingkatkn rating, dan sering update t
    blog kamu... N.. Hati-hati jangan sampe curang alias sering ngeklik
    ads anda sendri nanti di banned loh..


    Good Luck.... 4 U All...

    Monday, September 8, 2008

    DIY: Network Cable - RJ45

    Before we start, several tools must have near you.

    1. Cable network
    2. Crimping tool
    3. Cutter
    4. Network tester
    5. RJ45

    STEP 1
    Make sure how long you need for the cable. Example if the distance is 10 meters, cut the network cable to 11 meters. We need more because if you make mistake we can do it again with same cable.

    STEP 2
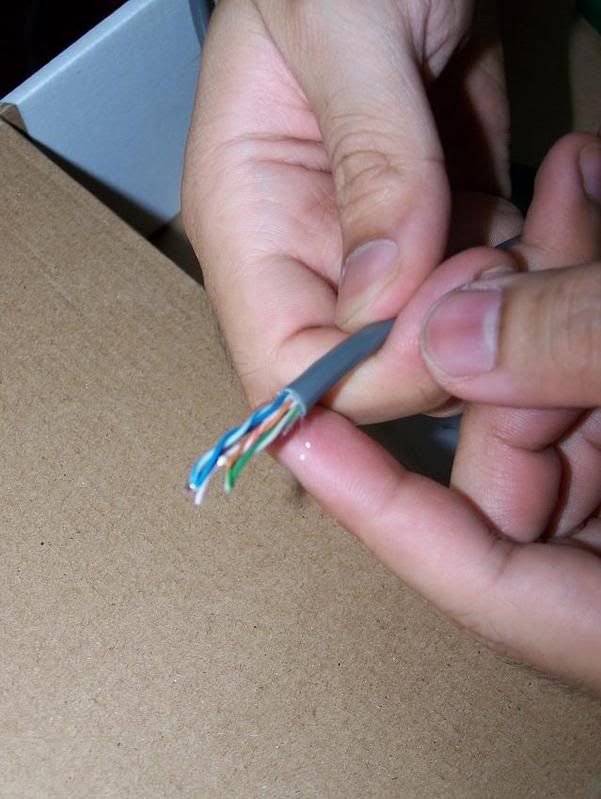
    Cut & remove cover of network cable. Remove it around 2cm

    As you can see, my crimping tool have cutter on it. Cut it off


    After remove, it's will look like this


    STEP 3

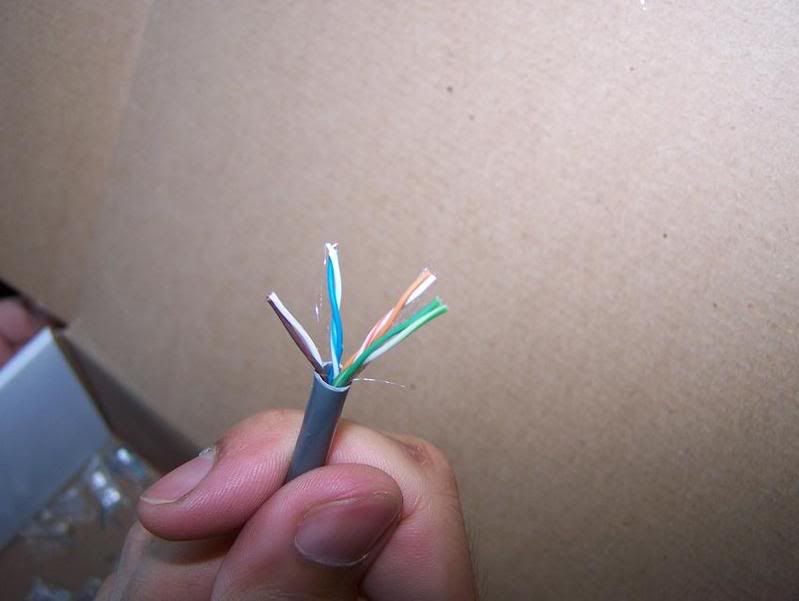
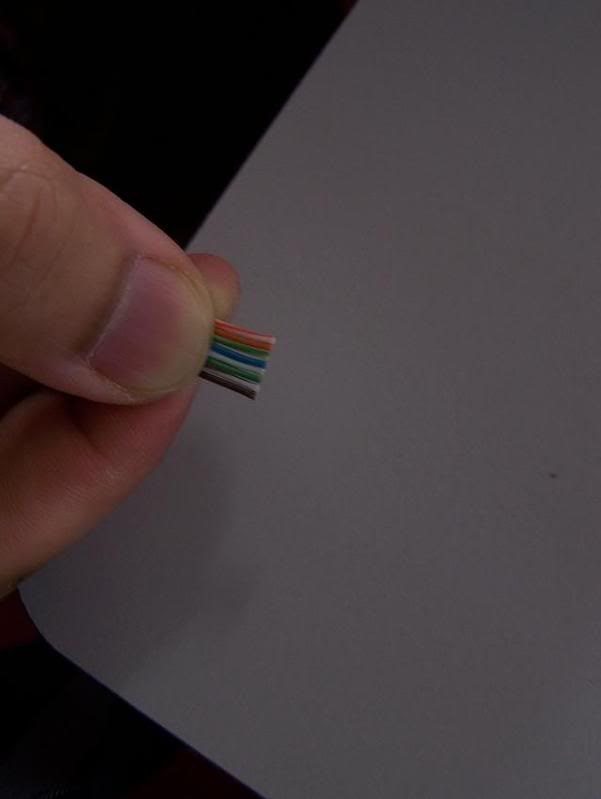
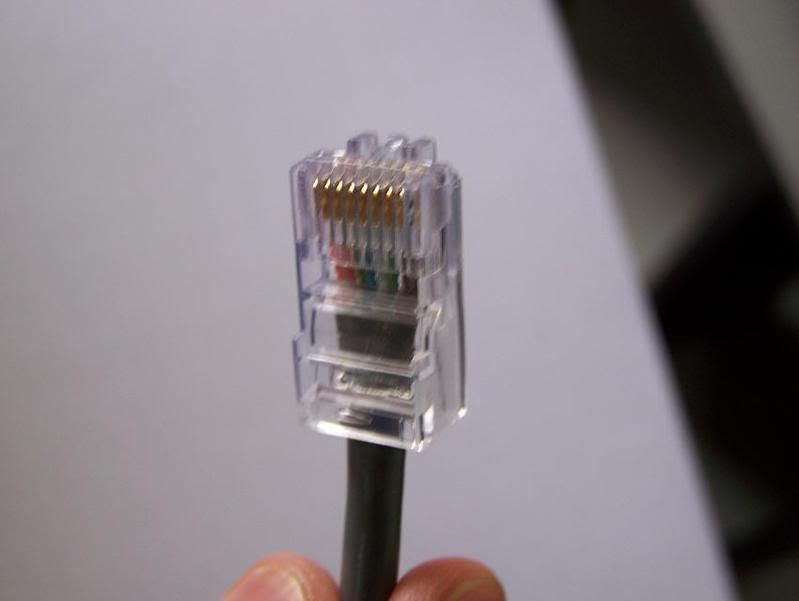
    Make cable look like this (see the picture)


    As picture show, some is short and some is not


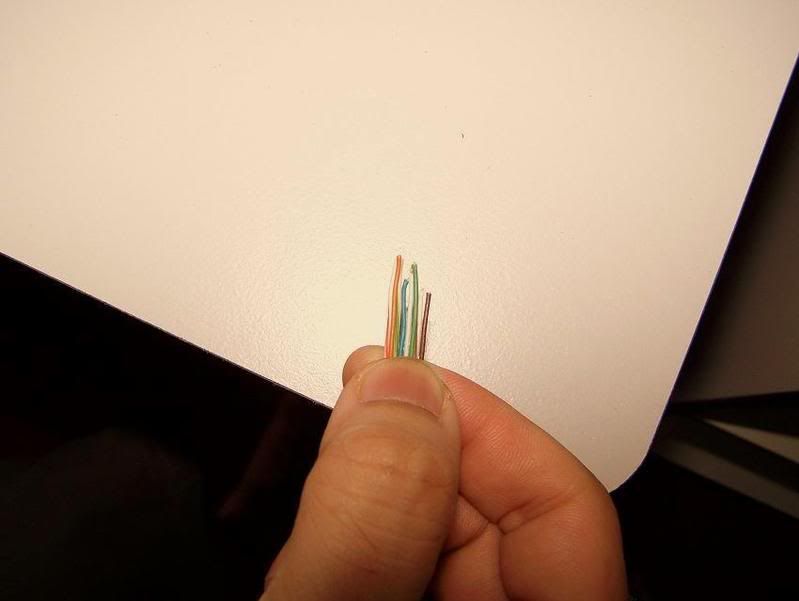
    Cut the edge of cable and make it same.


    This is the result


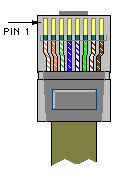
    Manage the all color cable same as note above. Don't make mistake in this stage


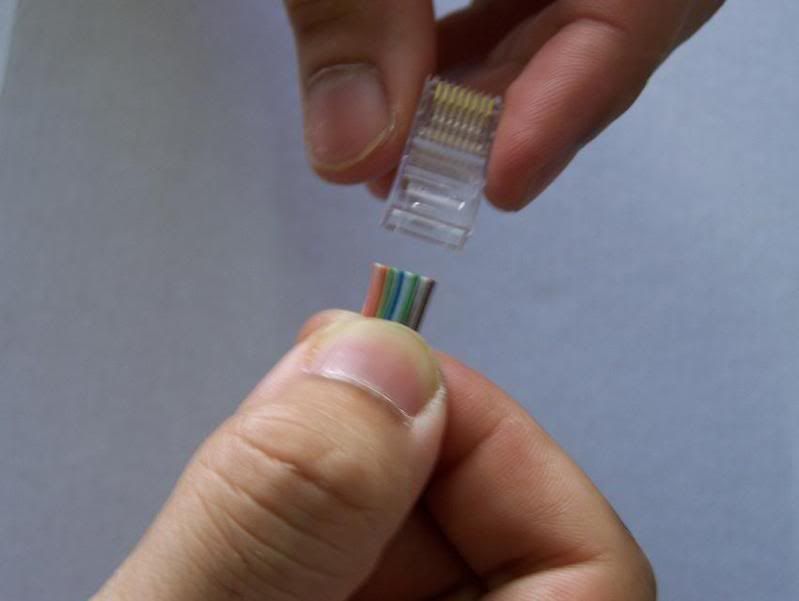
    Put in RJ45 soket after you make sure it's manage as diagram above


    1 small slot for 1 small cable only, so please careful on this step


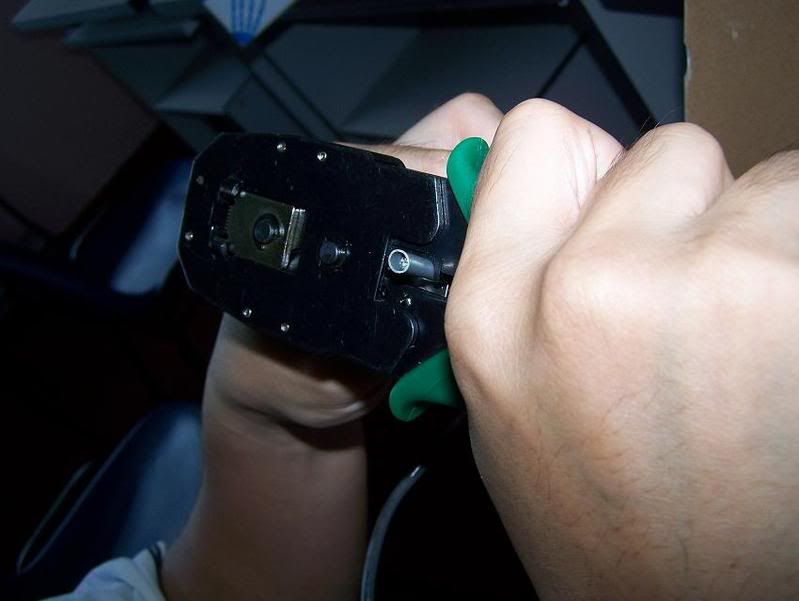
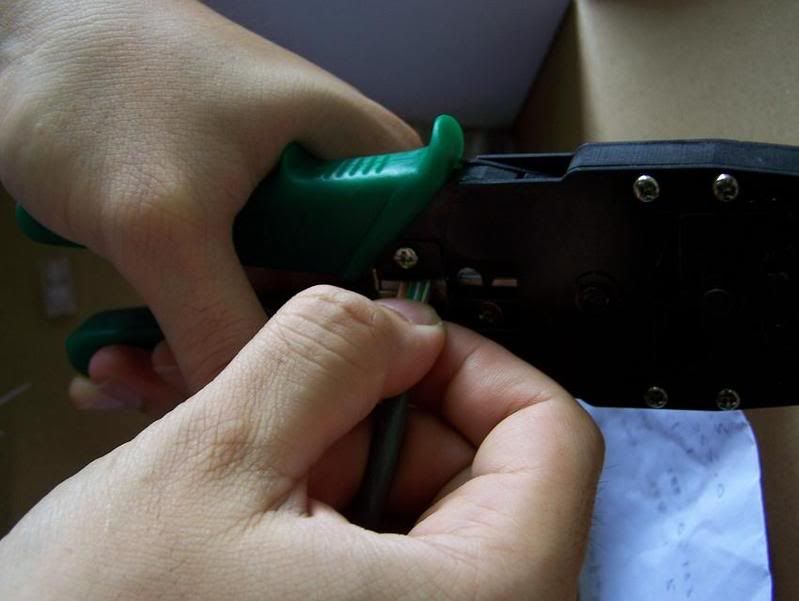
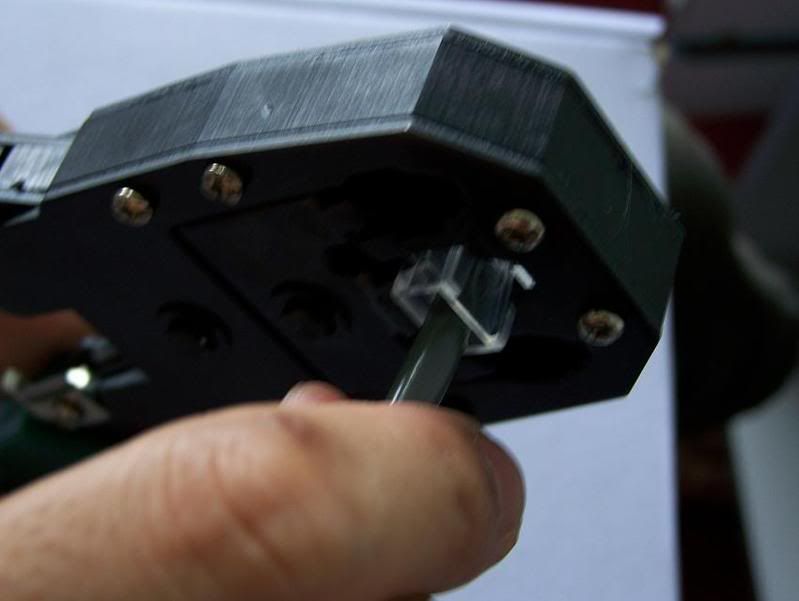
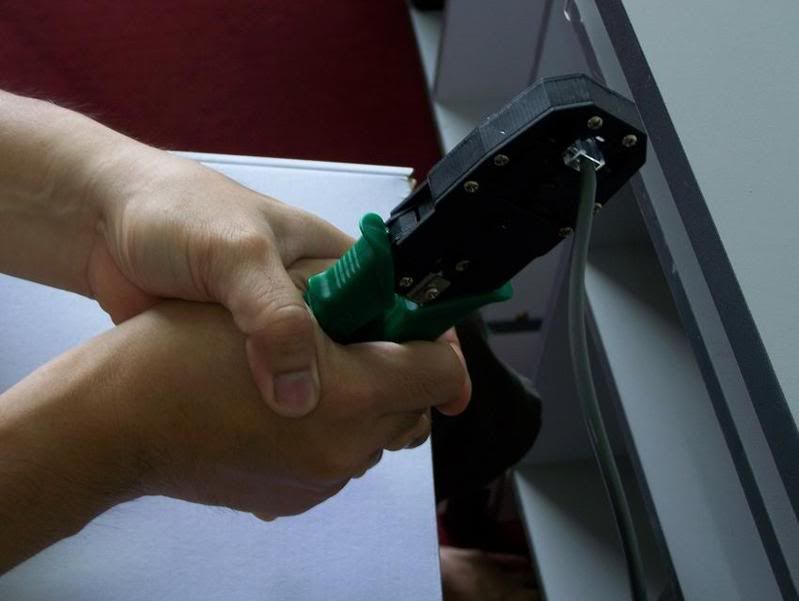
    Put it into crimping tool and crimp it harder.


    See picture above


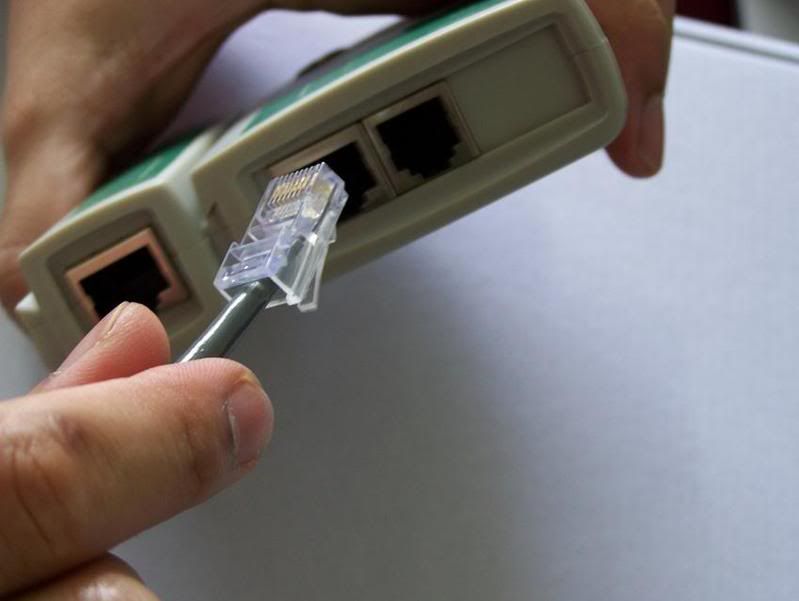
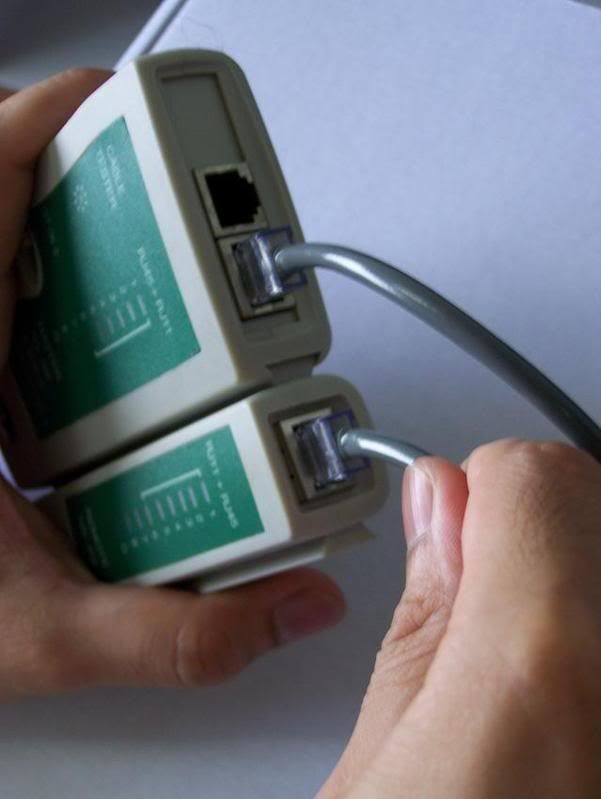
    After finish both side, put it in tester


    The other side also put it in tester


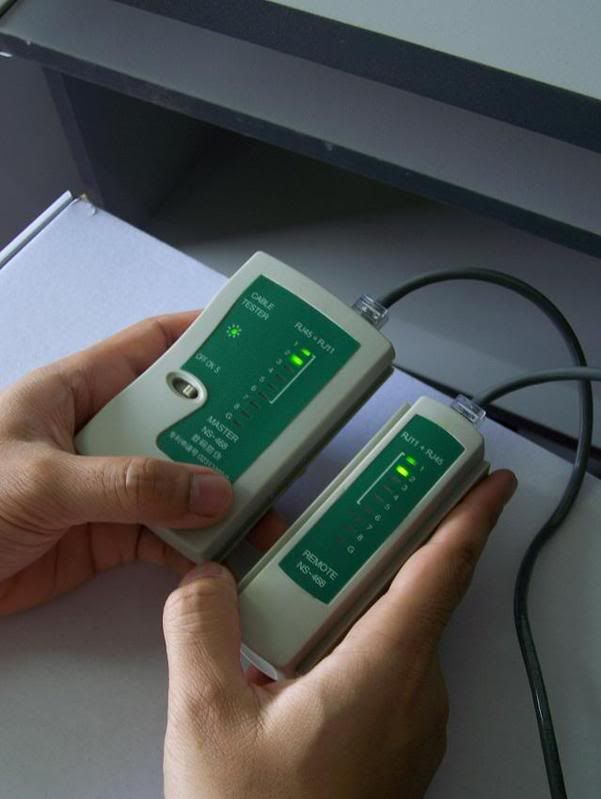
    Switch on the tester.
    If the green lights on from number 1 to 7, thats mean successful.
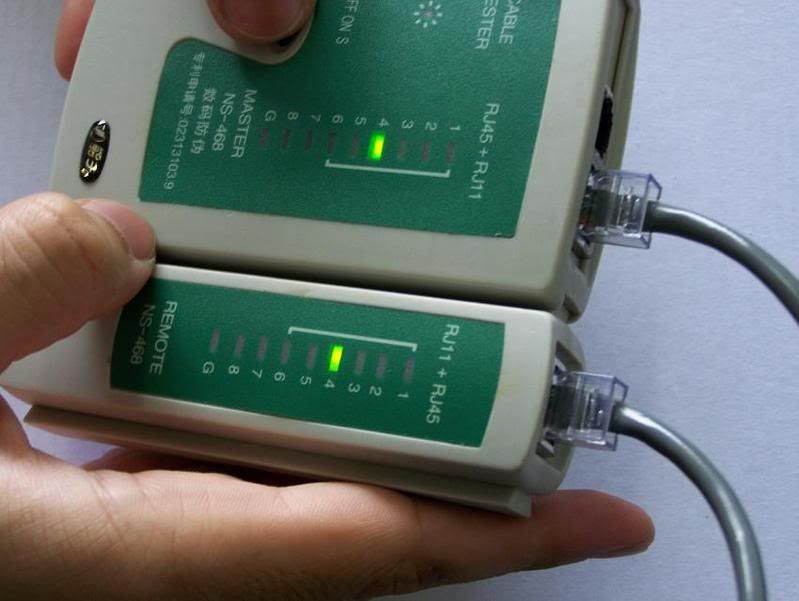
    If the lights on looping number or others number light is not come out,
    thats mean you make mistake


    If lights not on from 1 to 7, identify which side have problem and then cut it off
    and repeat step2 until it's working properly

    Friday, September 5, 2008

    HOW TO: Upload file to hosting - FireFox

    After finish you design your website using any application such as Dreamweaver or else, this is step by step how to upload all files to web hosting. But this is not for FREE WEB HOSTING uploading.


    If your Mozilla Firefox doesn't have Fire FTP, follow this step. Else skip this step.
    Open Mozilla Firefox
    Click on Tools > Add-Ons


    Click on Get Extantions


    Type FireFTP on search & hit enter


    Download & install Fire FTP


    After Finish installation, click on
    Tools > FireFTP


    For the first time, set up your new account, click on
    Manage Accounts & select New


    Type your Account Name, Host, Login & Password
    Example if your url is www.example.net, put "ftp://example.net" in Host.
    After finish click ok & click Connect button to start connection to your host.


    After hit connect button, if you see right side of your browse appear as picture above, thats mean you now connected with host server.

    Now you can transfer all your website files to your hosting. But remember, copy all your files in "www" folder and make sure your mainpage file named index.html or index.htm so when user type your url www.example.net will directly goto index.html file (www.example.net/index.html)

    LinkWithin

    Related Posts Plugin for WordPress, Blogger...